TACU · AI Video Production Platform
Planning, generation and editingin one project
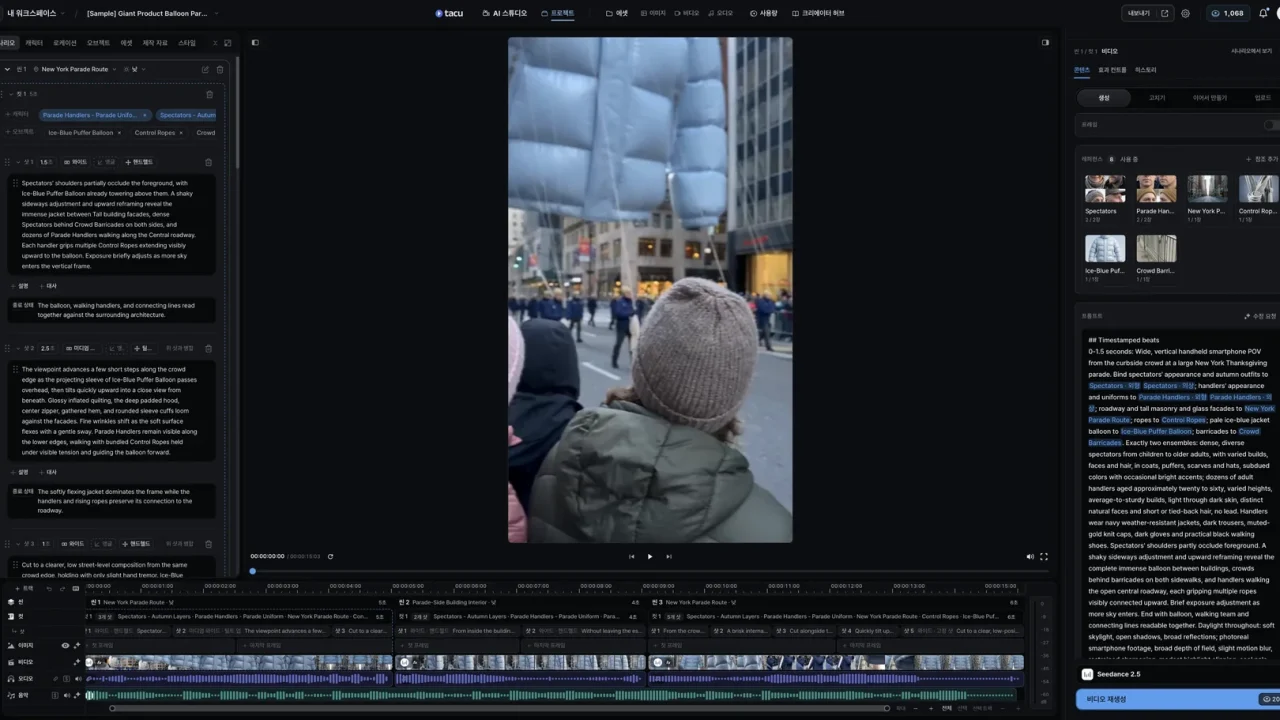
Tacu is an AI video production platform developed and operated by Cutib. It connects the script with characters, costumes, locations and props, along with the generated images, video and audio, inside one project.
Build scenes from ideas and references, then select generated cuts and edit them into a single video. When the plan changes mid-production, you can remake the scenes you need and refine them together with the surrounding cuts.
START
Video Production That Starts from Stories and References
From a story and reference images or documents, Tacu drafts the script and production elements. You can flesh out characters, events and the mood of the setting, and develop the story by refining dialogue and scenes.
Styles and editable templates offered in Explore can also be the starting point for a new story. The same workflow applies to ads and brand videos made from product photos and catalogs.
-
From Idea to Script [ 01 ]
Develop characters, situations, plot and mood into a draft script. Edit dialogue and scenes directly to shape the direction of the story.
-
Using Styles and Templates [ 02 ]
Use works in Explore that offer style import or remix as the starting point for new work. Adapt the imported styles and elements to the characters, products and spaces of your new story.
-
Building Scenes from Products and References [ 03 ]
Use product photos, catalogs and descriptions to decide what information and scenes the video should include. Link images to the story or production elements to depict products, characters and spaces.
PRE-PRODUCTION
Script and Visual Design
Using the same characters and spaces across many scenes means matching not only dialogue and action but also looks, costumes and props. Tacu links scenes and cuts with descriptions and reference images of characters, costumes, locations and props inside the project.
Refine the script and production elements to shape the scene structure, then turn the cuts you choose in the storyboard into video.
Script and Storyboard
Turn the plot and dialogue into a scene and cut structure. Work on the script and camera setup together to design the flow and look of each scene.
Characters, Costumes, Locations, Props
Organize descriptions and reference images of characters' looks and costumes, locations and props as production elements. Link the characters and spaces each cut needs, and use them to refine recurring elements.
Reference Images and Multiple Views
Link your own photos and generated images as references for production elements. In Multi-view, compare images from several angles to define how characters and spaces look.
Batch Generation of Selected Cuts
Set the cut and camera settings and the model, then batch-generate the selected cuts based on estimated credits. For cuts affected by script changes, regenerate the prompts to apply them to the next video generation.
AI STUDIO
AI Studio for Images, Video and Audio
Work that needs a single image, a single cut, or a voice and sound can be done in AI Studio. Create media with the image, video and audio models and references suited to the task, and use the results in the project's production elements and edit.
Making individual visuals and completing multi-scene work happen in the same production environment.
-
Image Work [ 01 ]
Create visuals of characters, spaces and products as images and use them as references for production elements. Bring generated and existing images into the project for scene building and editing.
-
Video Work [ 02 ]
Generate a single scene or add motion to a reference image. Use the first/last-frame and reference settings available per model, and choose which of several results to use in your project.
-
Voice and Sound [ 03 ]
Create voices for dialogue and narration, as well as music and sound effects. Place the generated audio on the timeline with the video to match the length and rhythm of each scene.
RETAKE
Keep the good cuts,
remake the scenes you need.
Keep finished scenes and remake only the cuts you need. Compare previous and new results in each cut's generation history, choose the take to use, and apply it to the edit.
With batch generation and rework driven by script changes, you can refine a changing plan scene by scene.
Compare in History
Review multiple results for the same cut and compare composition, expression and motion. Earlier results remain in the generation history and serve as a reference alongside new attempts.
Regenerate Selected Cuts
Pick one or more cuts that need changes and remake them. Change the scene content and references, then regenerate the prompt and video to get closer to the intended result.
Choose the Take for the Edit
Play the selected result with the surrounding cuts to refine how scenes connect. With models that offer a draft mode, review the look in draft first, then render the selected cut as final.
EDIT & EXPORT
Video Editing and Multilingual Production
Edit selected cuts and images, voice, music, sound effects and text together on the timeline. Align scene order and length, sound and subtitles, and finish versions for each language.
Export as a Premiere Pro project or Final Cut XML package to continue editing in your existing post-production environment.
Video and Sound Editing
Arrange video and images, trim the parts you need, and adjust transitions and sound. Edit audio and text on the same timeline to match the flow and running time of scenes.
Language Versions
Produce language versions with dialogue translation, voice generation and automatic subtitles. Edit and preview the translation, voice and subtitles of each version before exporting the video.
Finished Videos and Edit Projects
Download finished videos or export Premiere Pro project packages and Final Cut XML packages. Take media and timelines into your existing editing tools to continue post-production.
REUSE
Reusing Styles and Production Elements
Characters, spaces and styles you've defined once can be used in other stories. Start new work by importing styles and elements from Explore, remixing, or duplicating the pre-production of your own project.
Reuse your production materials while changing dialogue, scenes and character or product references to make a new video.
-
Importing Styles and Elements [ 01 ]
Import available styles and elements from Explore works that offer style import. Adjust settings and production elements to fit the direction of your new story.
-
Duplicating Pre-production [ 02 ]
Bring scene descriptions and dialogue with assigned locations, element images and styles into a new project. Develop the next video's script and scenes from your organized pre-production.
-
Editable Templates [ 03 ]
Works that offer remix can be used as editable templates to start new work. Modify the imported story and elements in your own project and develop them into a new video.
TEAM
Team Projects and Production Budgets
Separate personal and team work and set access to projects and assets. See estimated credits before generating alongside actual usage per project to judge the scale and cost of the work.
Run a production budget shared by many people with team credits and per-member limits.
Projects, Assets and Access
Move personal projects and assets into a team workspace to use them together. Share work and reference materials according to team roles and project permissions.
Estimated Cost and Actual Usage
Get estimated credits based on model, settings and number of results, plus actual usage and generation counts per project. Review reasons for failed requests and credit refund status in the job history.
Team Credits and Limits
Transfer purchased personal credits to the team and set usage limits per member. Separate the team balance from personal usage to allocate the generation budget according to the scale of work.


